|
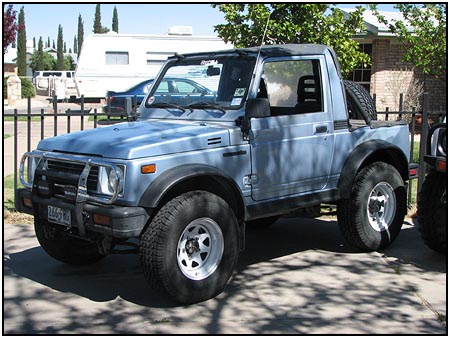
Putting the power between the fenders with Bill Johnston
|
||
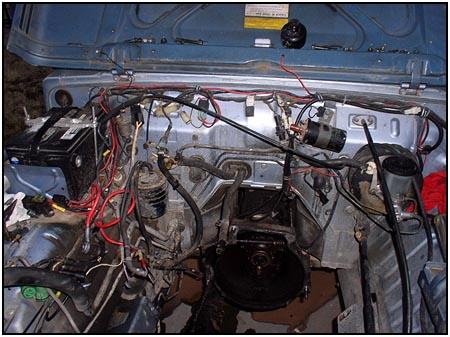
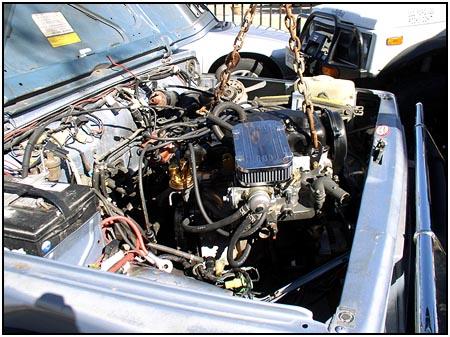
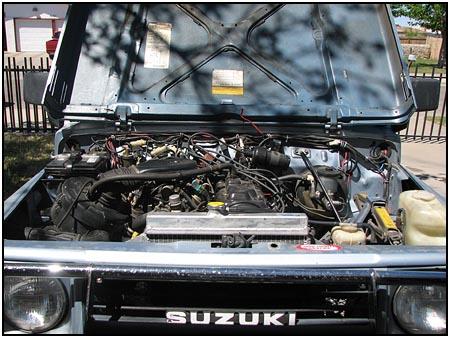
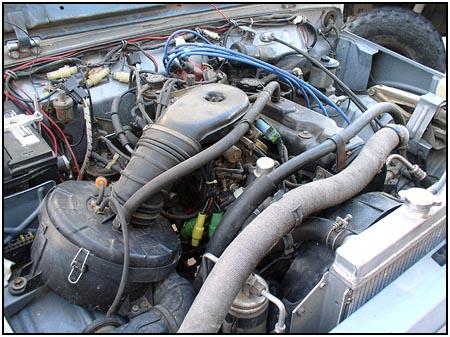  Here
is what the engine bay looked like before we did anything. Eventually the
engine compartment will have fewer hoses and wires. But first we have to
start by pulling the old powerplant out to make room for the new one. Here
is what the engine bay looked like before we did anything. Eventually the
engine compartment will have fewer hoses and wires. But first we have to
start by pulling the old powerplant out to make room for the new one. |
||
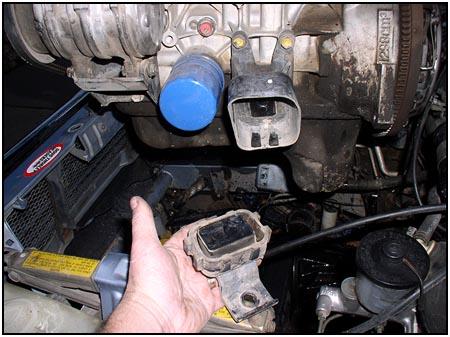 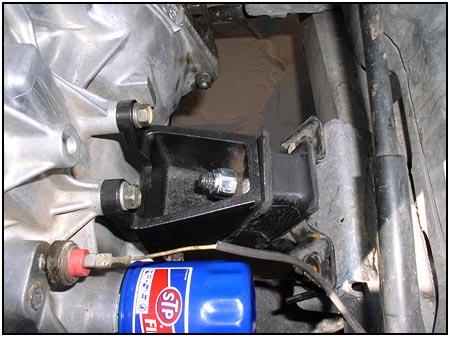 As
we removed the original 1298, we found a problem that wasn't evident during
its job as a daily driver. The motor mount had already given its life and
was in need of a replacement. We went for a set of Dodge 318 motor mounts
from the local parts shop. Much stronger than stock, and only $4.95 apiece.
The picture to the right is a little jump ahead when the new motor was
dropped in place. It did raise the motor almost a quarter of an inch. As
we removed the original 1298, we found a problem that wasn't evident during
its job as a daily driver. The motor mount had already given its life and
was in need of a replacement. We went for a set of Dodge 318 motor mounts
from the local parts shop. Much stronger than stock, and only $4.95 apiece.
The picture to the right is a little jump ahead when the new motor was
dropped in place. It did raise the motor almost a quarter of an inch. |
||
 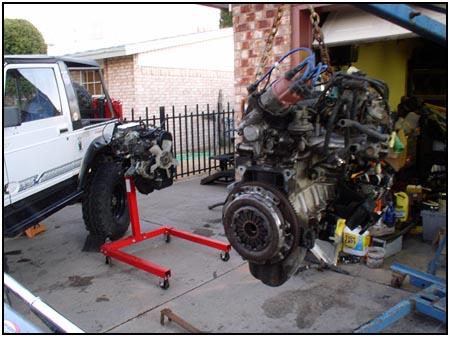 The
1298 came out without much of a problem. The recently installed replacement
clutch will be reused on the new motor for now so we needed to pull it and
move it over. We see a need in the future for something more powerful as the
build goes on, but for the break-in period, this should be fine. The
1298 came out without much of a problem. The recently installed replacement
clutch will be reused on the new motor for now so we needed to pull it and
move it over. We see a need in the future for something more powerful as the
build goes on, but for the break-in period, this should be fine. |
||
 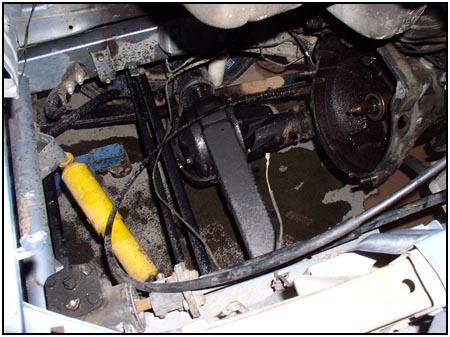 Here
is when it's a good time to clean up the engine compartment. If you look
closely at the axle in the picture to the right, you will notice the top of
the axle looks a little different. One of the previous upgrades came in the
form of an axle brace (gussett) from Sky Manufacturing. It was put on the
top to add strength while keeping it fairly hidden from the untrained eye. Here
is when it's a good time to clean up the engine compartment. If you look
closely at the axle in the picture to the right, you will notice the top of
the axle looks a little different. One of the previous upgrades came in the
form of an axle brace (gussett) from Sky Manufacturing. It was put on the
top to add strength while keeping it fairly hidden from the untrained eye. |
||
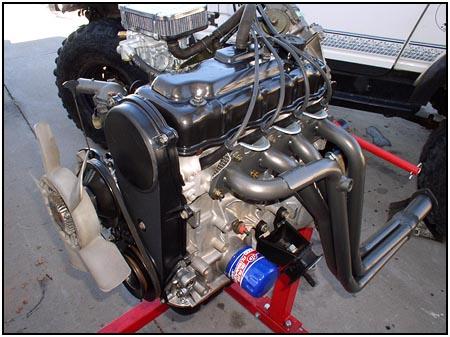
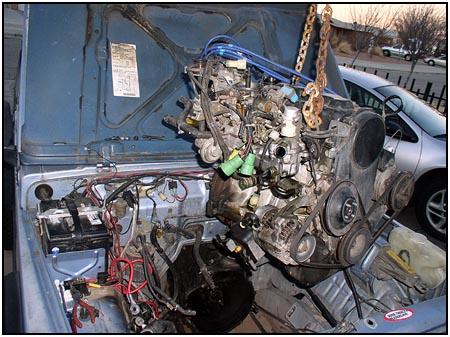
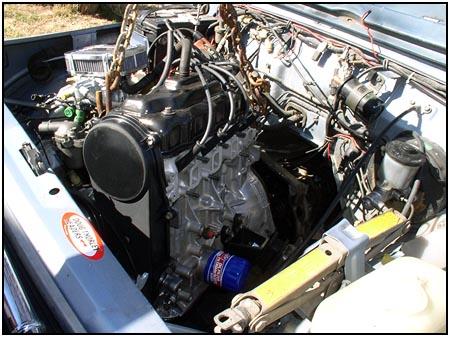
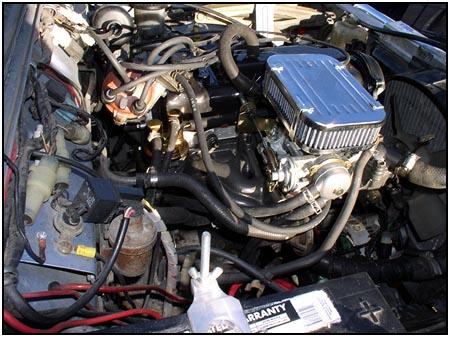
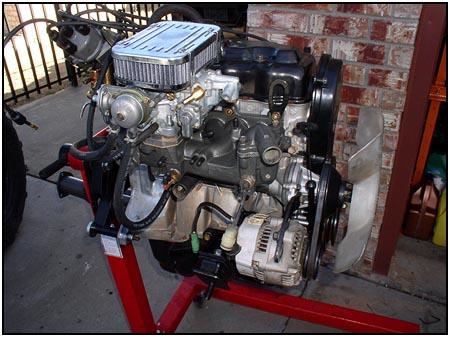 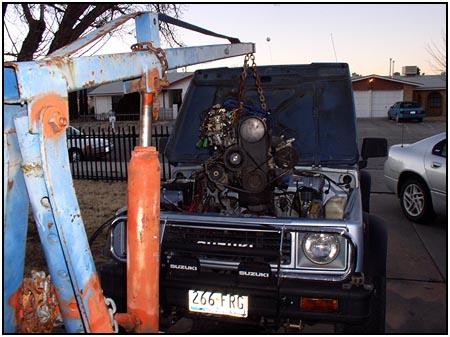 The
preassembled 1324 motor was dropped into place with an engine hoist.
Normally a Sammy motor is easy to swap out by hand, but when you bolt all the bells
and whistles on to look good, it gets heavy... The
preassembled 1324 motor was dropped into place with an engine hoist.
Normally a Sammy motor is easy to swap out by hand, but when you bolt all the bells
and whistles on to look good, it gets heavy... |
||
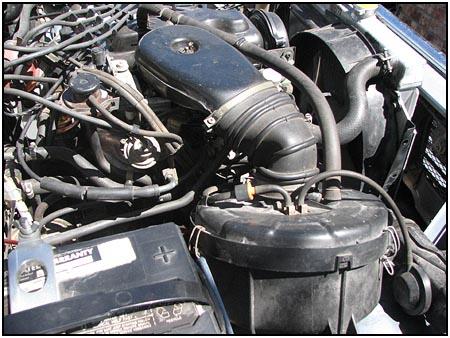
  One
of the easiest ways to make room to swap motors is to remove the radiator.
This Sammy had a non-functional air conditioning system, so we pulled it at
the same time. See? Plenty of room! The parts will be used later for a
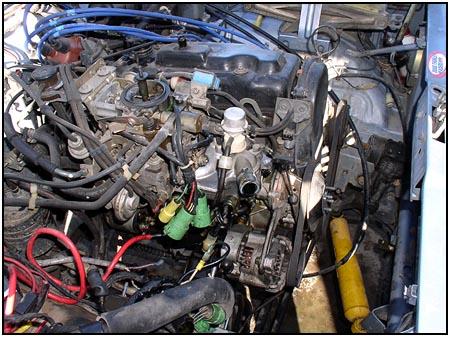
couple of more goodies that are in the plans. Here is a twist. One
suggestion we got from our 'tuner' buddies was to break in the motor using
the stock carb. One
of the easiest ways to make room to swap motors is to remove the radiator.
This Sammy had a non-functional air conditioning system, so we pulled it at
the same time. See? Plenty of room! The parts will be used later for a
couple of more goodies that are in the plans. Here is a twist. One
suggestion we got from our 'tuner' buddies was to break in the motor using
the stock carb. |
||
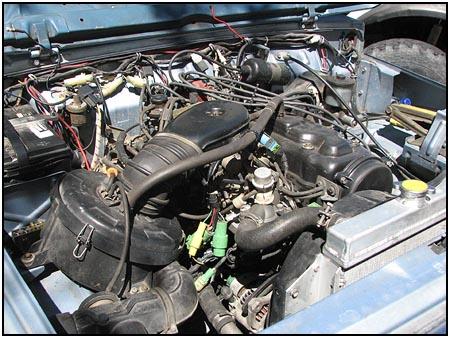  The
idea was confirmed when we talked with our Weber guru Kevin 'Sarge'
Lafferty. As of publication of this article, the 38DGAS Weber and a stock
manifold was on its way to him for some fine tuning before we install it in on
the motor. He said that trying to break in the motor and do an initial tune
on the new carb at the same time would be pretty tough, so we followed the
expert. Notice how the taller motor mounts cause a small bend in the rubber
air hose. When the Weber goes in, this won't matter. The
idea was confirmed when we talked with our Weber guru Kevin 'Sarge'
Lafferty. As of publication of this article, the 38DGAS Weber and a stock
manifold was on its way to him for some fine tuning before we install it in on
the motor. He said that trying to break in the motor and do an initial tune
on the new carb at the same time would be pretty tough, so we followed the
expert. Notice how the taller motor mounts cause a small bend in the rubber
air hose. When the Weber goes in, this won't matter. |
||
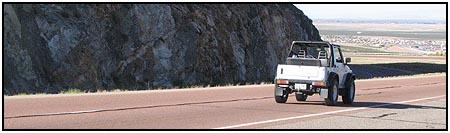
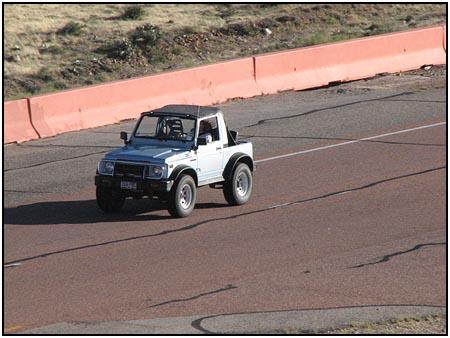 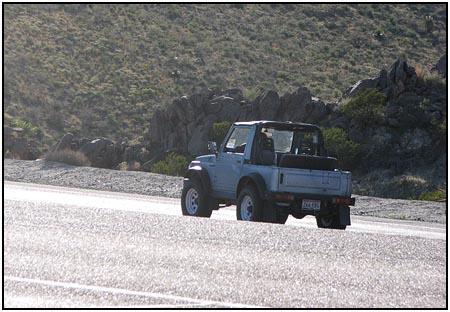 Taking
it on the road was next. As we ran the first 500 miles the motor showed a
much stronger push than I had expected. The intake and exhaust still has to
change to complete the kit, but this vehicle could now push 85mph on flat,
level surfaces. I'm not as amazed at the speed as I am at the quickness. I
know that the 4.57 gears from Low Range Off-Road had a part in that, but I
didn't think it would be so dramatic. After the first few hundred miles, we started playing with
5K rpm shifts and it ran like a champ. They say to break in the motor the way
you intend to drive it... needless to say this isn't going to be your
grandmothers Samurai! Taking
it on the road was next. As we ran the first 500 miles the motor showed a
much stronger push than I had expected. The intake and exhaust still has to
change to complete the kit, but this vehicle could now push 85mph on flat,
level surfaces. I'm not as amazed at the speed as I am at the quickness. I
know that the 4.57 gears from Low Range Off-Road had a part in that, but I
didn't think it would be so dramatic. After the first few hundred miles, we started playing with
5K rpm shifts and it ran like a champ. They say to break in the motor the way
you intend to drive it... needless to say this isn't going to be your
grandmothers Samurai! |
||
|
|
||
 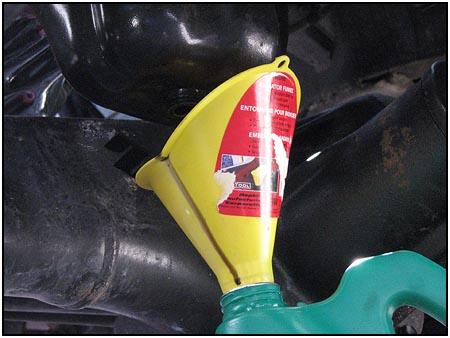 At
just over 500 miles on the odometer, we changed the oil and checked it for any telltale
metal shavings, gas or water. It got a clean bill of health! At
just over 500 miles on the odometer, we changed the oil and checked it for any telltale
metal shavings, gas or water. It got a clean bill of health!
One thing I have found to keep the oil from spilling all over when any wind blows through, is to use a radiator fill funnel. The neck is larger and will allow the oil to drain faster. |
||
 So
far we are very impressed with the performance that this JFE rebuild has
shown. Watch for the next issue when we push the limits with the rest of its
upgrades. So
far we are very impressed with the performance that this JFE rebuild has
shown. Watch for the next issue when we push the limits with the rest of its
upgrades. |
||
|
Source:
John's
Foreign Engines |
||
 |
07/08/2010