|
1.6ltr
/ 16v Conversion with Bill Johnston Everyone knows that the stock 1.3ltr engine in a samurai is barely adequate as it comes from the factory, but when you start adding upgrades and heavy off road goodies it gets downright pathetic. The Grey Ghost project truck has had many of these upgrades and the old 1.3ltr engine (although helped along with a header and aftermarket exhaust) was ready for a replacement. Instead of just stopping at the typical 1.6/8v replacement, it was decided to just go the extra mile and replace it with a 1.6/16v model. |
||
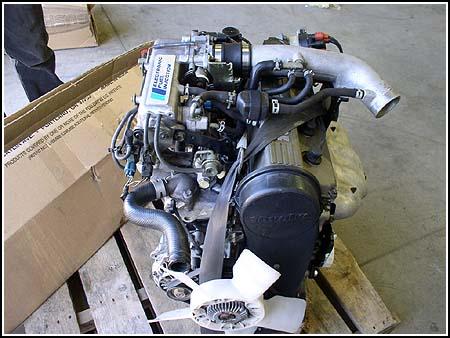  Placing
an order with Brent at Trail Tough made lots of goodies appear at our
door. A complete 1.6/16v engine, computer and wiring harness, air cleaner,
an engine adaptor kit and a bunch of
power steering supplies that would
allow us to move the PS system that had been installed on the 1.3ltr power
plant. Placing
an order with Brent at Trail Tough made lots of goodies appear at our
door. A complete 1.6/16v engine, computer and wiring harness, air cleaner,
an engine adaptor kit and a bunch of
power steering supplies that would
allow us to move the PS system that had been installed on the 1.3ltr power
plant. If you are putting together your own power steering with new parts, check the link for a great deal. Use them with whatever adapter kit you are using. |
||
 |
||
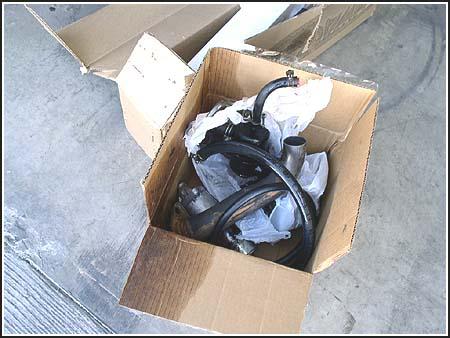
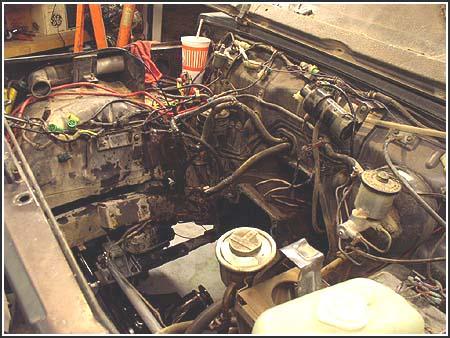
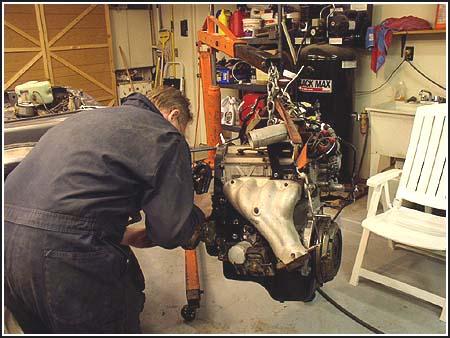
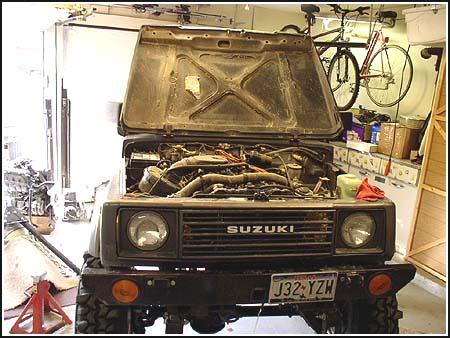  First
order of business was to get the old tired stock block out of the way. It
had really served its owners well but didn't have the power the newest owner was
looking for. First
order of business was to get the old tired stock block out of the way. It
had really served its owners well but didn't have the power the newest owner was
looking for. |
||
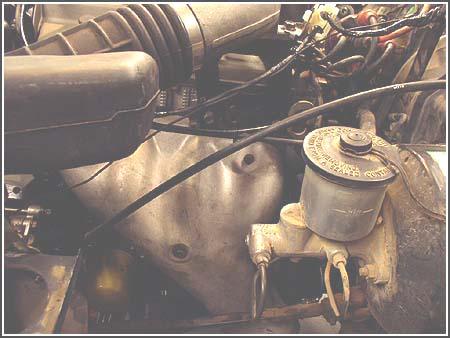
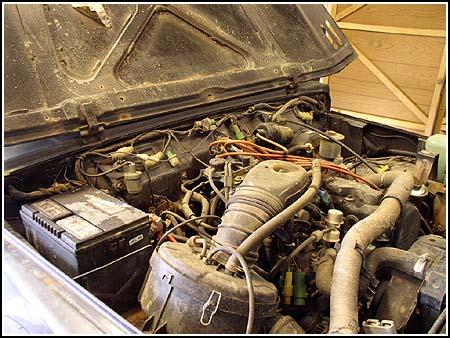
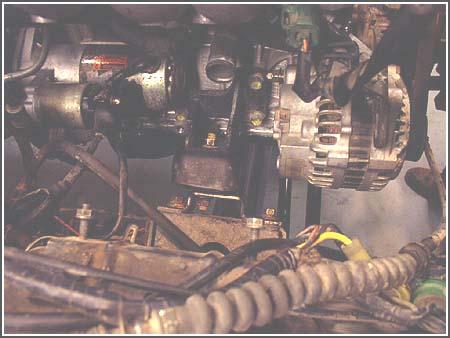
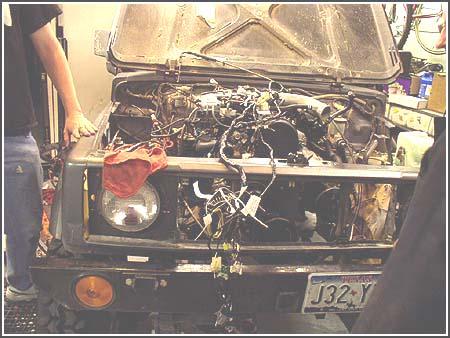
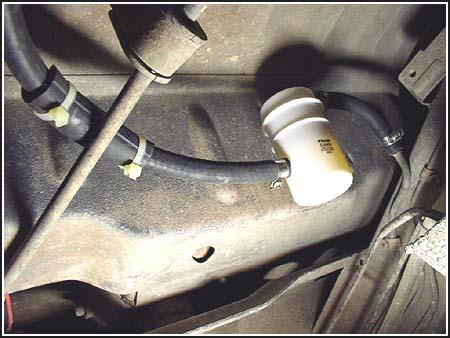
 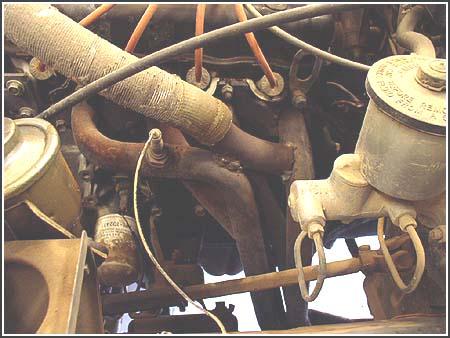 Here
you can see the header that had been installed years ago. The air heater
hose bracket had been welded on to comply with emissions. The power
steering unit can be seen (sort of) along with the power steering fluid reservoir. Here
you can see the header that had been installed years ago. The air heater
hose bracket had been welded on to comply with emissions. The power
steering unit can be seen (sort of) along with the power steering fluid reservoir. |
||
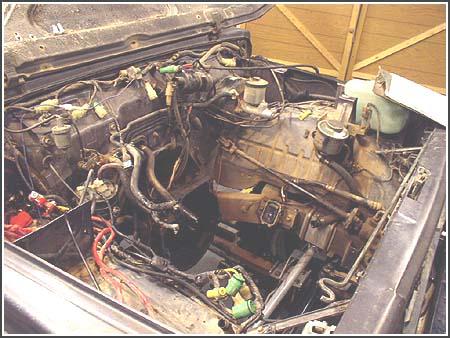  The
engine came out clean in about 30 minutes. We used this time to clean out
the engine compartment a little, tying up wires and putting everything in
order. The
engine came out clean in about 30 minutes. We used this time to clean out
the engine compartment a little, tying up wires and putting everything in
order. |
||
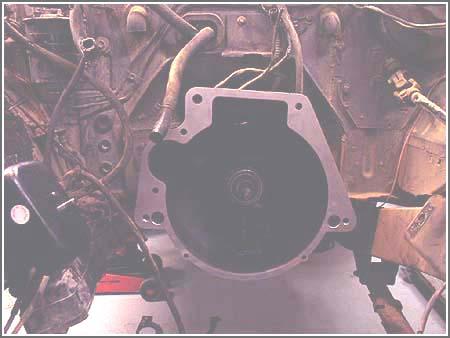
  Here
you can see Sean Farley (the owner) install the brackets needed for the power steering unit. You can
also see that we had already installed the Samurai flywheel and the Petroworks
high performance clutch by this time. Here
you can see Sean Farley (the owner) install the brackets needed for the power steering unit. You can
also see that we had already installed the Samurai flywheel and the Petroworks
high performance clutch by this time. |
||
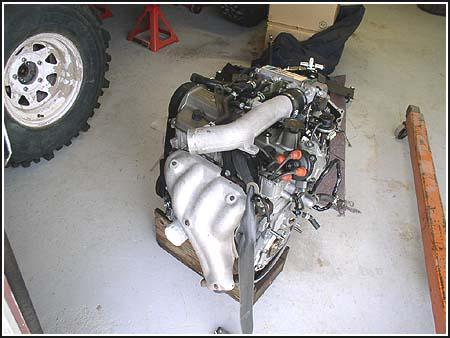
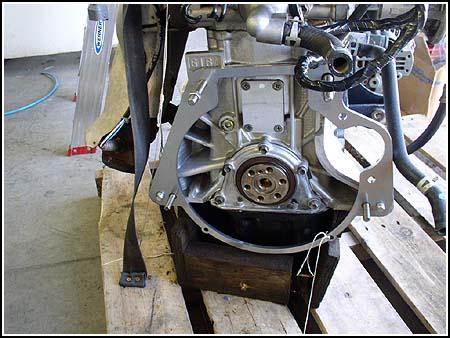
  The
engine adapter is a must when mating a Samurai transmission to a larger
block (1.6ltr) engine. The upper bolts are in the right position, but the
lower bolts are farther apart. You can see where the flush mount bolts go
in to hold the adapter to the transmission (close to the opening) and the
new bolt holes are seen just outside of them. Click on the photo for a
closer look. Although you can normally drop a bare Suzuki block into place
with your bare hands, it is not recommended when all the external bits are
in place. The
engine adapter is a must when mating a Samurai transmission to a larger
block (1.6ltr) engine. The upper bolts are in the right position, but the
lower bolts are farther apart. You can see where the flush mount bolts go
in to hold the adapter to the transmission (close to the opening) and the
new bolt holes are seen just outside of them. Click on the photo for a
closer look. Although you can normally drop a bare Suzuki block into place
with your bare hands, it is not recommended when all the external bits are
in place. |
||
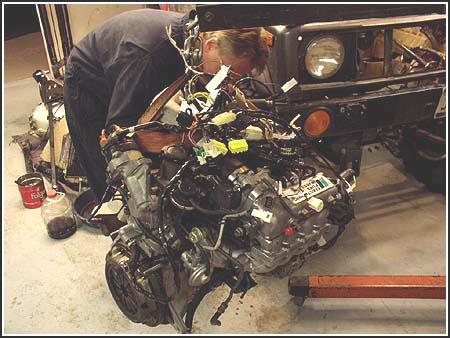
  The
hardest part of the whole installation is mating the engine to the
transmission. Most of the time it will just slide into place, but only
when you have plenty of time to waste and no deadlines. Otherwise it will
take lots of wiggling, tugging, pushing and a few choice words. The trick
is to get the splines to line up right the first time and then be careful
not to just 'stab' it into place. If you are a little off, you can damage
the rear main seal and then you have a leak from the word go. The
hardest part of the whole installation is mating the engine to the
transmission. Most of the time it will just slide into place, but only
when you have plenty of time to waste and no deadlines. Otherwise it will
take lots of wiggling, tugging, pushing and a few choice words. The trick
is to get the splines to line up right the first time and then be careful
not to just 'stab' it into place. If you are a little off, you can damage
the rear main seal and then you have a leak from the word go. |
||
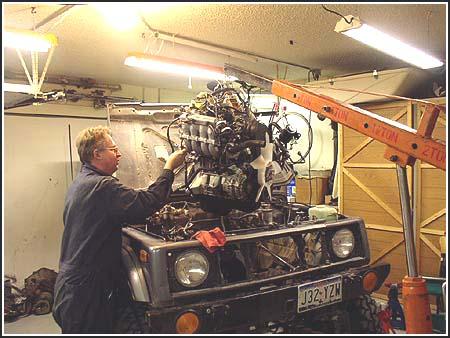
  Using
the Trail Tough engine kit leaves the bottom end of the engine in the same
place the original engine sat. Since the 1.6/16v is a taller engine, the
front clip would have to be raised just a bit using the included
replacement front body bushings. This vehicle has a body lift already
though, so we got to skip that part. Using
the Trail Tough engine kit leaves the bottom end of the engine in the same
place the original engine sat. Since the 1.6/16v is a taller engine, the
front clip would have to be raised just a bit using the included
replacement front body bushings. This vehicle has a body lift already
though, so we got to skip that part. |
||
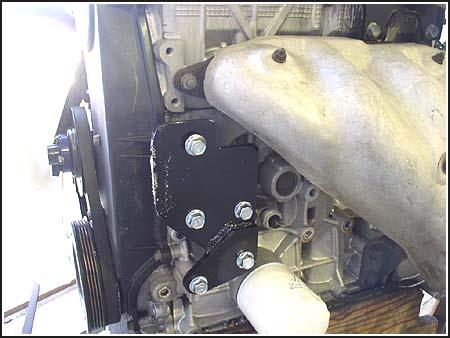
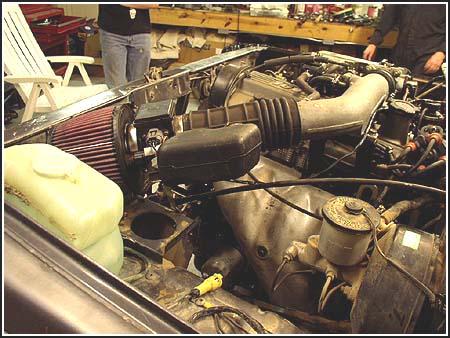
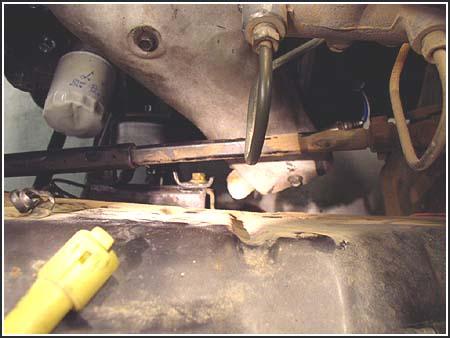 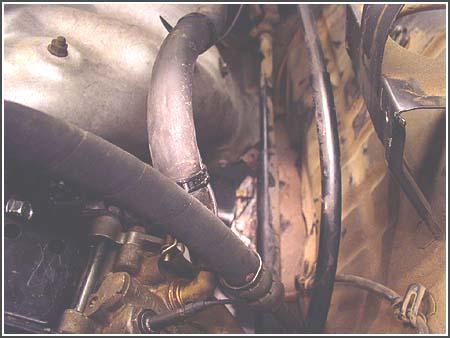 The
stock exhaust manifold comes very close to the frame rail, but surprisingly
it cleared it without any additional modifications. The picture on the
left is from above looking over the fender, the shot on the right is from
the front of the vehicle looking through the power steering hoses. The
stock exhaust manifold comes very close to the frame rail, but surprisingly
it cleared it without any additional modifications. The picture on the
left is from above looking over the fender, the shot on the right is from
the front of the vehicle looking through the power steering hoses. |
||
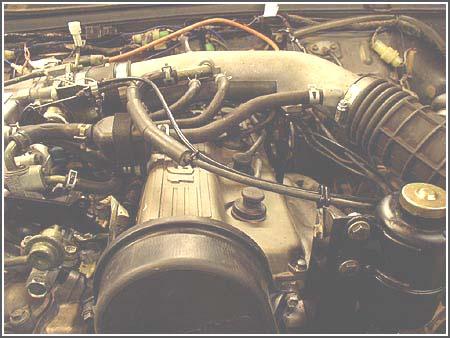
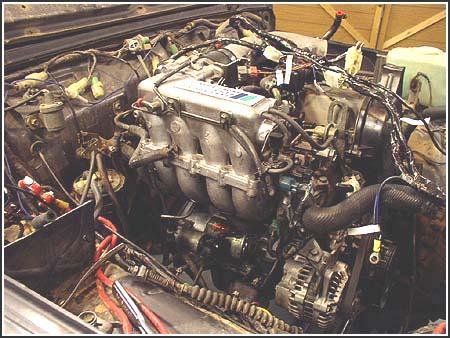
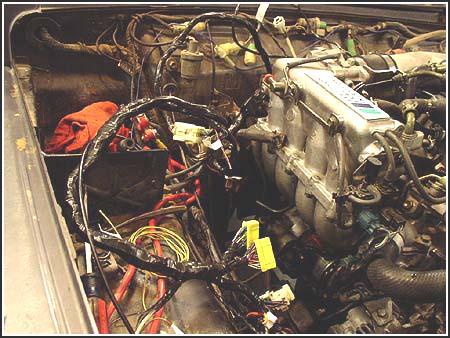
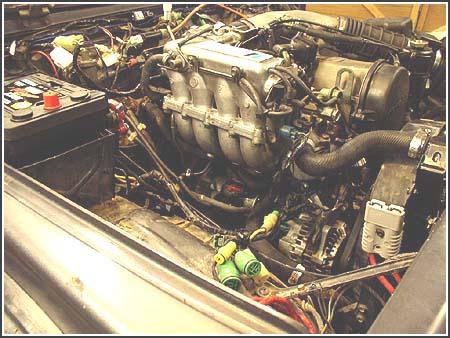
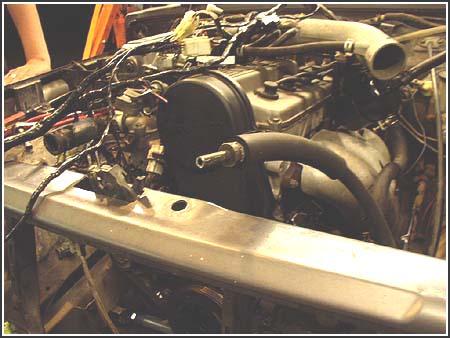  Looks
pretty ragged with all the hoses and cables hanging out of the engine
compartment, eh? Don't worry, there is a place for everything and
everything has a place... patience and a little attention to detail goes a
long way. Looks
pretty ragged with all the hoses and cables hanging out of the engine
compartment, eh? Don't worry, there is a place for everything and
everything has a place... patience and a little attention to detail goes a
long way. |
||
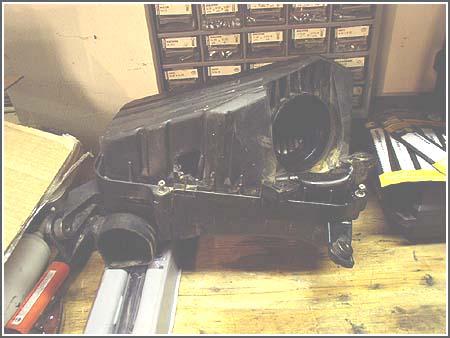
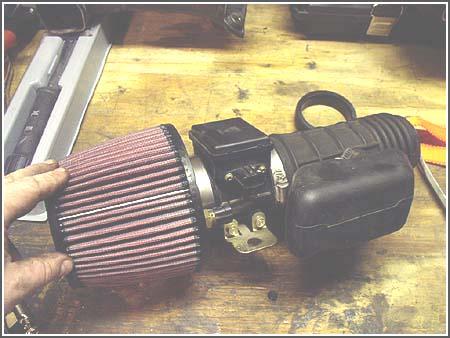
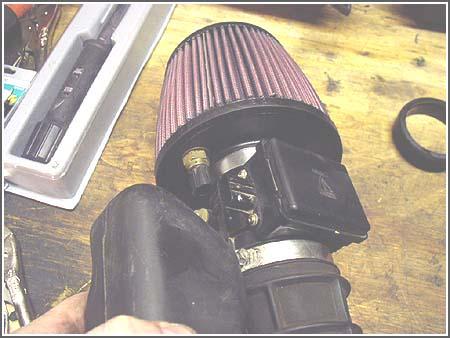
 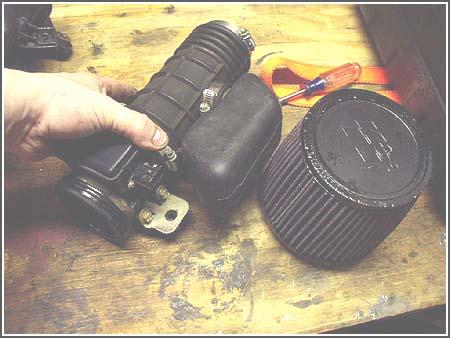 Here
is where we build a cool air cleaner out of the bulky box unit that came
with the engine. Trail Tough supplied the K&N cone filter along with
the stock box. After removing the neck from the box, we also had to remove
the sensor that is made into the box. We were careful not to harm the
sensor in any way, but the box seems like it got the bad end of the stick.
You can see a hole where the sensor used to be (lower left photo). We
drilled a hole in the cone filter and then installed the sensor. Here
is where we build a cool air cleaner out of the bulky box unit that came
with the engine. Trail Tough supplied the K&N cone filter along with
the stock box. After removing the neck from the box, we also had to remove
the sensor that is made into the box. We were careful not to harm the
sensor in any way, but the box seems like it got the bad end of the stick.
You can see a hole where the sensor used to be (lower left photo). We
drilled a hole in the cone filter and then installed the sensor. |
||
|
|
||
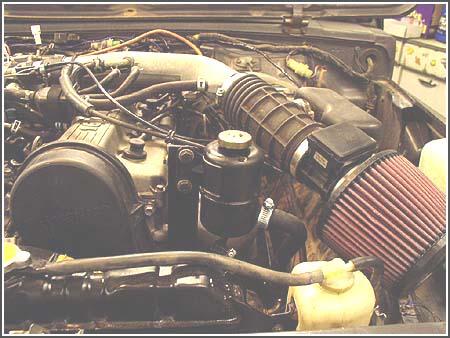
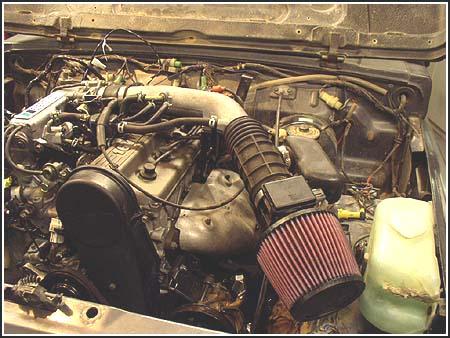  When
we added the air cleaner to the engine compartment, we noticed right away
that the power steering reservoir would have to find another home. We
fabbed up a small bracket to keep the air cleaner just above the stock
jack mount on the drivers side inner fender well. There was just enough
room to mount the breather without it getting crushed by the hood. When
we added the air cleaner to the engine compartment, we noticed right away
that the power steering reservoir would have to find another home. We
fabbed up a small bracket to keep the air cleaner just above the stock
jack mount on the drivers side inner fender well. There was just enough
room to mount the breather without it getting crushed by the hood. |
||
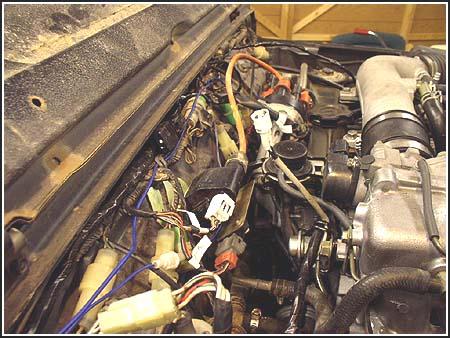
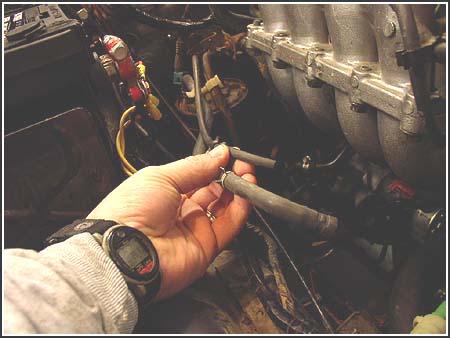
  The
wiring harness and accelerator cable came next. If you are a stickler for
neat installations then here is where you can really shine. We found that
the new wiring harness could be held along the firewall with zip ties so
it would blend in with the stock unit. You just have to pay close
attention to leave plenty of 'play' in the cabling so that when the engine
moves it will not get torn out. The picture on the right shows the routing
of the accelerator cable and the new location of the PS fluid reservoir.
It is on a bracket we fabbed to bolt right on the engine block. There
wasn't anywhere else to put it. (After testing and then thrashing we found
that the vibration of the engine had no ill effects on the system. The
wiring harness and accelerator cable came next. If you are a stickler for
neat installations then here is where you can really shine. We found that
the new wiring harness could be held along the firewall with zip ties so
it would blend in with the stock unit. You just have to pay close
attention to leave plenty of 'play' in the cabling so that when the engine
moves it will not get torn out. The picture on the right shows the routing
of the accelerator cable and the new location of the PS fluid reservoir.
It is on a bracket we fabbed to bolt right on the engine block. There
wasn't anywhere else to put it. (After testing and then thrashing we found
that the vibration of the engine had no ill effects on the system. |
||
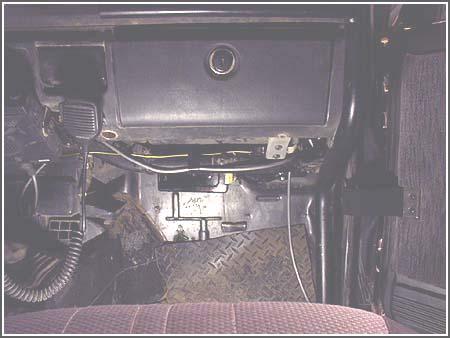
 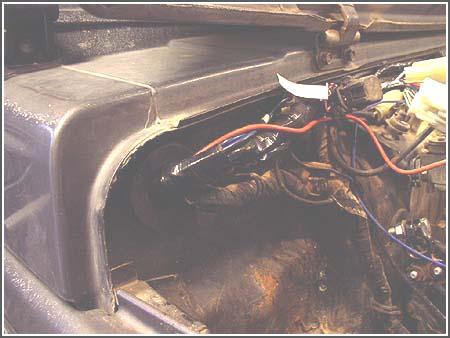 Here
you can see where the new harness is attached along the firewall and then
run into the rubber grommet behind the battery. This takes it down to the
area where we mounted the new computer. Here
you can see where the new harness is attached along the firewall and then
run into the rubber grommet behind the battery. This takes it down to the
area where we mounted the new computer. |
||
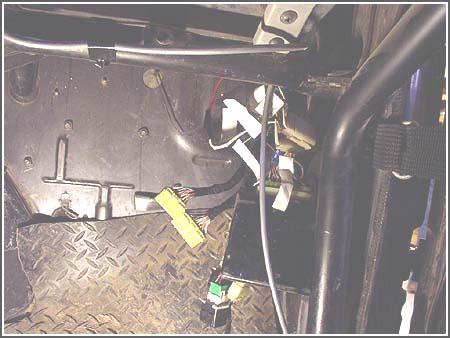
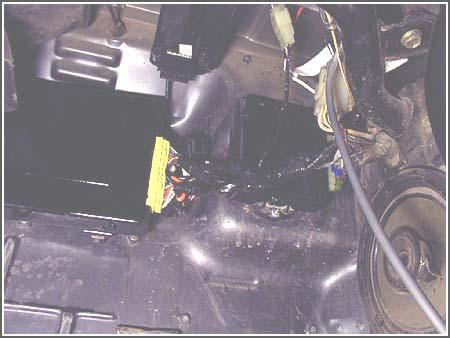
| Plugging and splicing in all the
wires for the computers didn't take very long. When everything was plugged
in, we noted how much play we had in the wires and installed the
components where they would be least likely to get kicked or damaged. As a
matter of fact, you can only see them if you lay your head on the seat.
The picture in the lower right shows how hidden they are.
|
||
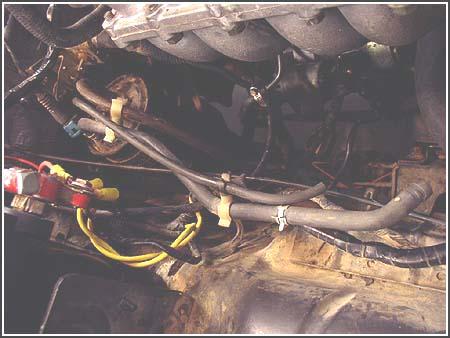
 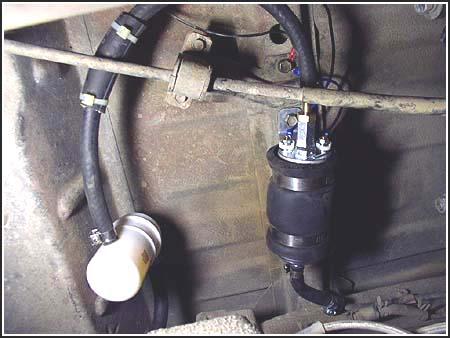 This
fuel injected engine went into a, 87 Samurai, so an electric fuel pump
came in the installation kit. The trick to this installation is all in the
mounting... if you don't use the insulation provided, or you tighten it up
too much it will be veeeery noisy. We also added a bit of old hose and zip
ties to protect the fuel line from scuffing where it came close to the
emergency brake cable. This
fuel injected engine went into a, 87 Samurai, so an electric fuel pump
came in the installation kit. The trick to this installation is all in the
mounting... if you don't use the insulation provided, or you tighten it up
too much it will be veeeery noisy. We also added a bit of old hose and zip
ties to protect the fuel line from scuffing where it came close to the
emergency brake cable. |
||
  Overall,
this was a fairly simple installation. All the hard stuff (wiring mostly)
is done for you in the kit. You just have to add the muscle and a little
attention to detail when setting everything into place. There are a few
other kits out there, but most don't include the wiring harness setup like
this one. One last thing, You have to send your gauge cluster back to
trail tough so they can make a small electronic change* so that your speedometer
will talk to the new ECM (computer). Overall,
this was a fairly simple installation. All the hard stuff (wiring mostly)
is done for you in the kit. You just have to add the muscle and a little
attention to detail when setting everything into place. There are a few
other kits out there, but most don't include the wiring harness setup like
this one. One last thing, You have to send your gauge cluster back to
trail tough so they can make a small electronic change* so that your speedometer
will talk to the new ECM (computer).
*Editors Correction |
||
|
|
||
| Component Source:
Trail Tough
Products |
08/22/22 14:18:47