|
Tom Woods CV Driveshaft
with Bill Johnston
 It only takes a first glance at one of Tom Wood's drive shafts to
realize the quality, workmanship and attention to detail that is put
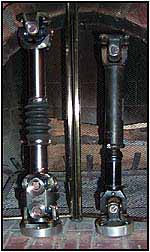
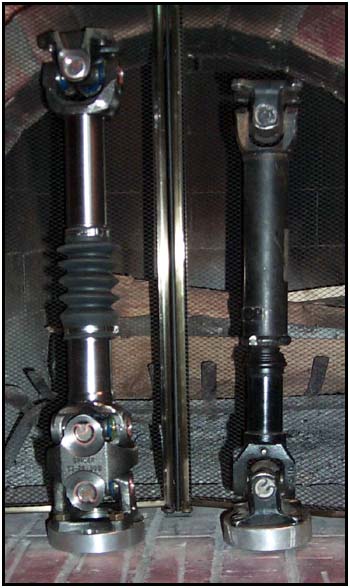
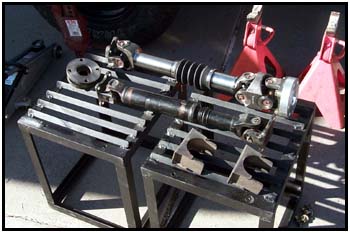
into each and every unit that Tom ships. The photo on the right shows
the new CV drive shaft and the stock Samurai unit side by side. The CV
joint is an excellent way to solve that "mysterious" drive
shaft vibration that has cropped up after you lifted your rig!
Driveline angles can be tricky to figure out, here is your cure. It only takes a first glance at one of Tom Wood's drive shafts to
realize the quality, workmanship and attention to detail that is put
into each and every unit that Tom ships. The photo on the right shows
the new CV drive shaft and the stock Samurai unit side by side. The CV
joint is an excellent way to solve that "mysterious" drive
shaft vibration that has cropped up after you lifted your rig!
Driveline angles can be tricky to figure out, here is your cure.
Both
shafts are resting on aluminum spacers. The stock unit is resting on a
standard aluminum billet model that is common among most of the
aftermarket vendors, but the new unit comes with an adapter made from
T6 Aircraft grade aluminum that allows the use of the double cardan
(CV) joint without re-drilling anything. Tom makes these specifically
for each application. Tom offers a 'polished' option for
about $15. If you are going to show off, this is a good option to
consider. Otherwise the shaft is painted a utilitarian black. |
|
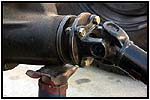
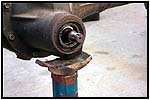
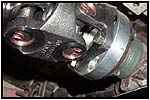
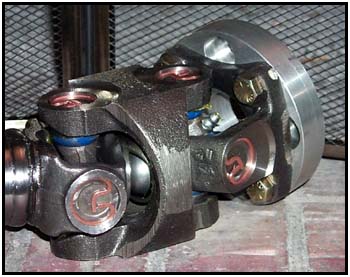
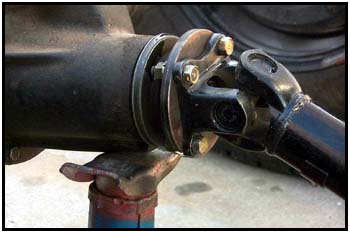
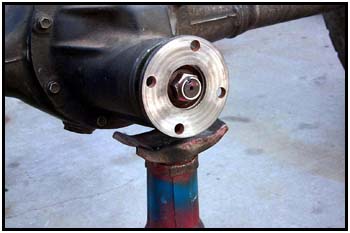
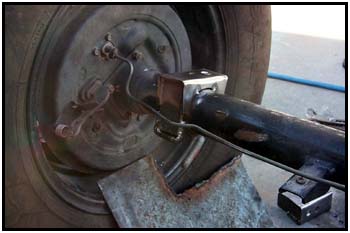
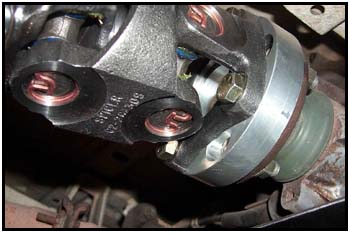
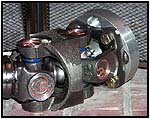  Upon
closer inspection of the CV joint, you will note that the universal
joints serve double duty. Not only do they hold the beefy outer ring
in place (seen on the right) but they also have a ball and socket
joint in the middle to hold everything in place when the forces of
nature want to twist it apart during a full droop! Upon
closer inspection of the CV joint, you will note that the universal
joints serve double duty. Not only do they hold the beefy outer ring
in place (seen on the right) but they also have a ball and socket
joint in the middle to hold everything in place when the forces of
nature want to twist it apart during a full droop!
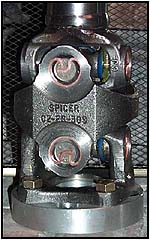
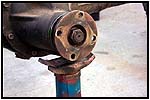
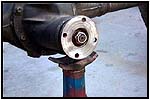
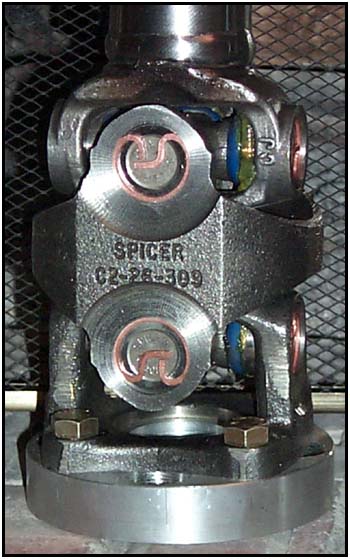
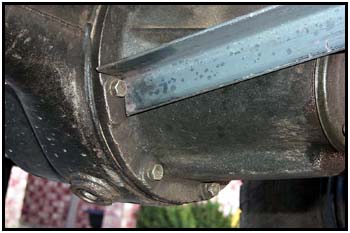
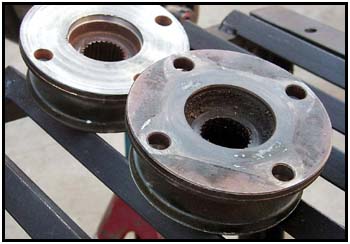
 The pinion flange on the left is the only part of the Samurai that
has to be machined. You will notice a small ridge machined into the
opening at the top, this is to allow the larger bore of the new
driveshaft flange to slide in and mate perfectly. The pinion flange on the left is the only part of the Samurai that
has to be machined. You will notice a small ridge machined into the
opening at the top, this is to allow the larger bore of the new
driveshaft flange to slide in and mate perfectly. |
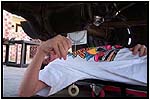
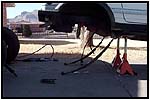
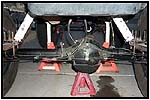
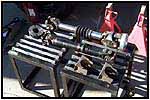 I
laid the parts out to make sure I had everything I would need. The new
spring perches are required because the rear pinion must be rotated up
to point directly at the transfer case. The new Heavy Duty Rocky Road
Outfitters SPOA Perches will replace the current perches. I
laid the parts out to make sure I had everything I would need. The new
spring perches are required because the rear pinion must be rotated up
to point directly at the transfer case. The new Heavy Duty Rocky Road
Outfitters SPOA Perches will replace the current perches. |
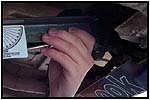
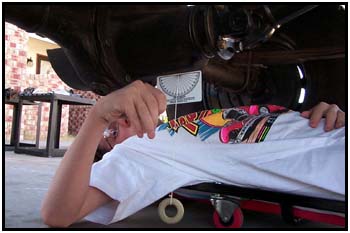
 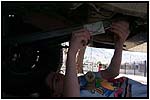 One
additional component that is included with every shaft Tom ships is an
angle finder that he has so cleverly disguised as a business card. It
is the same size and made with the same material as a standard plastic
credit card, so it is easy to store. In these photos you can see my
son checking the base angle of the differential and the angle that the
differential needs to be moved to. One
additional component that is included with every shaft Tom ships is an
angle finder that he has so cleverly disguised as a business card. It
is the same size and made with the same material as a standard plastic
credit card, so it is easy to store. In these photos you can see my
son checking the base angle of the differential and the angle that the
differential needs to be moved to. |
  You must measure this final angle
from the middle of the diff where it contacts the axle housing - to
the center of the transfer case flange. In our case, the
difference was 12 degrees. This is the rotation needed when we put on
the new spring perches. You must measure this final angle
from the middle of the diff where it contacts the axle housing - to
the center of the transfer case flange. In our case, the
difference was 12 degrees. This is the rotation needed when we put on
the new spring perches. |
|
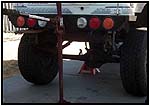
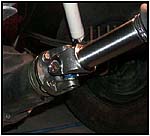
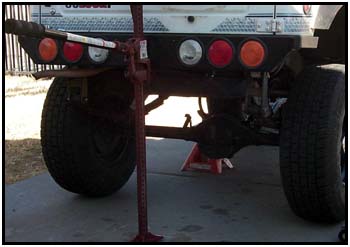
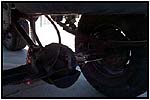  The pinion must end up pointing directly at
the transfer case. The CV Joint will be the only part that does any
bending. The pinion must end up pointing directly at
the transfer case. The CV Joint will be the only part that does any
bending. |
|
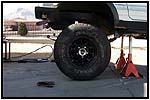
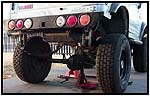
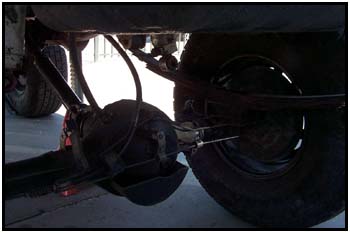
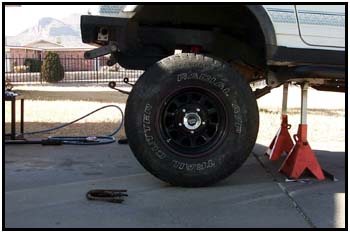
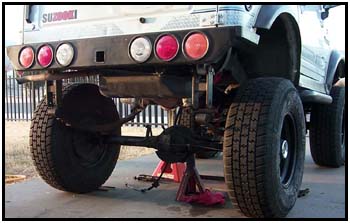
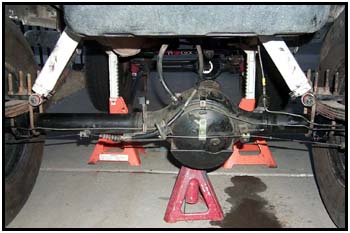
  Now it is time to disconnect the rear axle assembly. Make sure you
disconnect the brake line(s) before pulling the assembly out from
under the vehicle... or it could get messy very quickly. Now it is time to disconnect the rear axle assembly. Make sure you
disconnect the brake line(s) before pulling the assembly out from
under the vehicle... or it could get messy very quickly. |
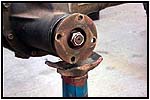
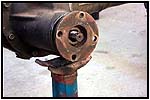
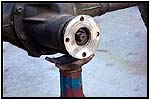
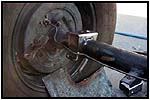
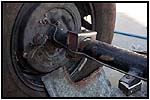
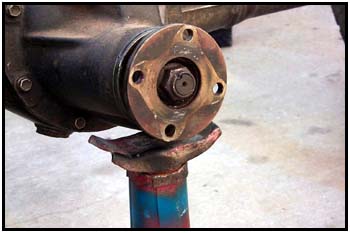
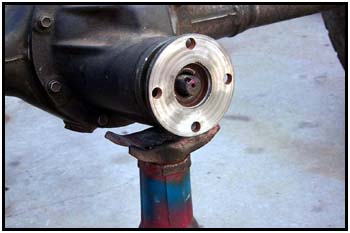
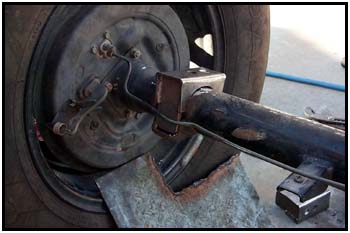
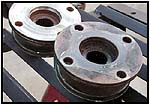  Next,
we concentrate on the pinion flange. This will either be easy or
very hard depending on how 'weathered' the components are. On the
right you will notice a stock pinion flange in the foreground and
the machined flange from earlier in the background. Next,
we concentrate on the pinion flange. This will either be easy or
very hard depending on how 'weathered' the components are. On the
right you will notice a stock pinion flange in the foreground and
the machined flange from earlier in the background. |
    |
|
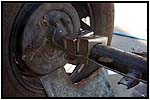
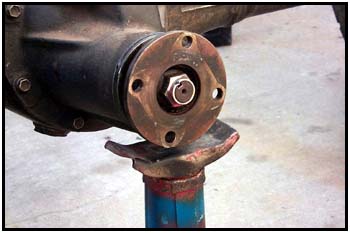
To remove the pinion flange, you must first remove the nut. Clean off
the nut so you will be able to see where it was 'notched' to keep it
from backing off. I used a small flat tipped screwdriver pounded
into the notch on the pinion to push out the notched material. Next,
remove the nut. If it won't budge, try a cheater pipe on the end of
a breaker bar. An air impact driver only cracked the socket when I
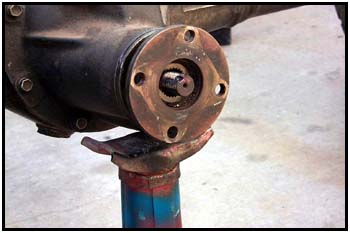
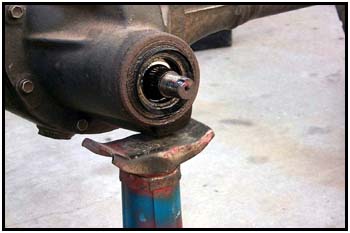
tried the first time... the cheater bar was much more effective. Use
a gear puller to remove the flange. Carefully replace it with the
newly machined component. Tom can do the machining for you, so when
you arrange for your new driveshaft mention it and he will take care
of you. |
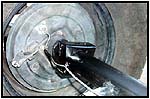
  Replace the nut, torque to factory specs and notch it with a cold
chisel. This is for safety. After complete reassembly you won't be
able to check the nut because it will be covered. You don't want the
flange to let go at the most inappropriate time. Replace the nut, torque to factory specs and notch it with a cold
chisel. This is for safety. After complete reassembly you won't be
able to check the nut because it will be covered. You don't want the
flange to let go at the most inappropriate time. |
  Next
we attack the Spring Perches! If you were planning to do a SPring
Over Axle
conversion then this is the time to do it! The perches need to rotated
so the pinion points to the transfer case. It is much easier to just
weld on new perches and go. Otherwise you must remove the old
components first without damaging the axle tubes. This vehicle had
SPOA perches already, so they had to come off. Next
we attack the Spring Perches! If you were planning to do a SPring
Over Axle
conversion then this is the time to do it! The perches need to rotated
so the pinion points to the transfer case. It is much easier to just
weld on new perches and go. Otherwise you must remove the old
components first without damaging the axle tubes. This vehicle had
SPOA perches already, so they had to come off. |
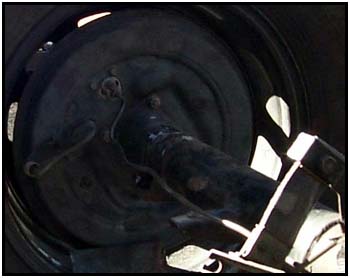
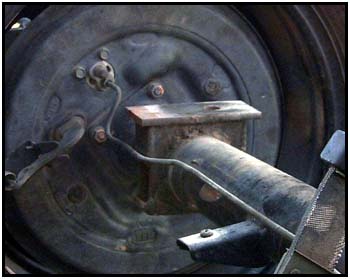
  The
newly redesigned Rocky Road Outfitters SPOA Perches were used to
replace the older perches. These are unique in design because the ends
extend to meet the original perches down below. In the photos to the
left it shows how much we had to rotate the perch to make up for the
12 degree difference we figured out in the beginning of the
installation. The
newly redesigned Rocky Road Outfitters SPOA Perches were used to
replace the older perches. These are unique in design because the ends
extend to meet the original perches down below. In the photos to the
left it shows how much we had to rotate the perch to make up for the
12 degree difference we figured out in the beginning of the
installation. |
  We had to grind off a small amount from one
"foot" to make the rotation possible. A couple of light tack
welds were used to hold the perch in place while we applied the major
portion of the heat to where the perches met. This ensures a solid
weld without compromising the integrity of the axle tube. Then a
little paint helps to keep the elements out of the nooks and crannies. We had to grind off a small amount from one
"foot" to make the rotation possible. A couple of light tack
welds were used to hold the perch in place while we applied the major
portion of the heat to where the perches met. This ensures a solid
weld without compromising the integrity of the axle tube. Then a
little paint helps to keep the elements out of the nooks and crannies. |
  Now
put everything back together - and don't forget the brakes! Now
put everything back together - and don't forget the brakes! |
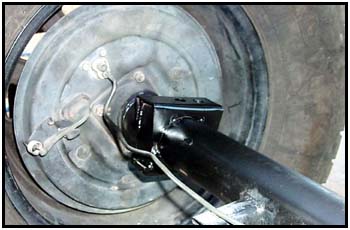
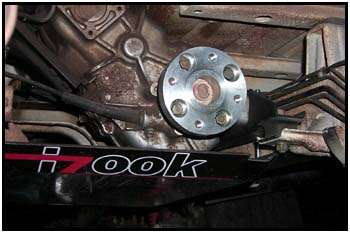
 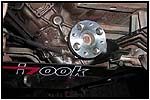 Now
it is time to install the adapter component that Tom includes with the
drive shaft. Using the stock bolts, secure it to the transfer case
flange. The bolt heads will be below the mating surface so they will
not get in the way when you bolt in the CV joint. Tom includes the
proper bolts to secure the CV joint end of the drive shaft to the
adapter. Torque them to factory specs... these drive shafts can handle
upwards of 1600 ft/lbs of torque, don't let loose bolts take away your
new capabilities! Now
it is time to install the adapter component that Tom includes with the
drive shaft. Using the stock bolts, secure it to the transfer case
flange. The bolt heads will be below the mating surface so they will
not get in the way when you bolt in the CV joint. Tom includes the
proper bolts to secure the CV joint end of the drive shaft to the
adapter. Torque them to factory specs... these drive shafts can handle
upwards of 1600 ft/lbs of torque, don't let loose bolts take away your
new capabilities! |
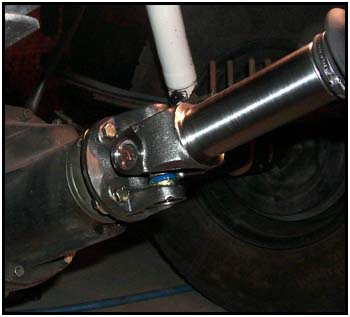
  The
rear of the shaft will bolt up to the samurai pinion flange. I had a
little trouble with the mating of these pieces because the pinion nut
was coming into contact with the cast metal inside the yoke. A few
passes with a file took down the offending metal on the nut and then
it fit like a charm. I have talked to Tom about this and he is looking
into the possibility that all pinion nuts aren't exactly the same
throughout the model years. There should be no problem in the
future. Torque everything to factory specs and you are ready to
take on the world! The
rear of the shaft will bolt up to the samurai pinion flange. I had a
little trouble with the mating of these pieces because the pinion nut
was coming into contact with the cast metal inside the yoke. A few
passes with a file took down the offending metal on the nut and then
it fit like a charm. I have talked to Tom about this and he is looking
into the possibility that all pinion nuts aren't exactly the same
throughout the model years. There should be no problem in the
future. Torque everything to factory specs and you are ready to
take on the world! |
|
Quality
components like these come with a hefty price tag. This unit sells for
$425 (plus tax if you are a resident of Utah). But let's put this into perspective. I
have two spare rear drive shafts (front shafts cut down for an
extended length) in my garage that I have had to replace often because
of trail breakage and vibration. Each of those 'junkyard specials'
cost me about $120 each time I had to have one replaced or rebuilt. If
I had gone with a drive shaft from Tom in the first place I know I
would have saved some big bucks by now. For those of you that are
thinking of making a purchase but want to save a few bucks, Tom will
give volume discounts for clubs or small groups that want to
place volume order. Tom will pick up the shipping charges to get
you the drive shaft and components via UPS Ground.
I
was pleasantly surprised each and every time I talked to Tom during the
course of this project. Not only does he make some of the most sought
after drive shafts in the business, but he will take the time to talk
with you about your application and any concerns you may have. He is
also a fountain of knowledge, so don't hesitate to ask him the hard
stuff!
Check out the Extreme
Component Review!
|
Sources:
CV Drive Shaft
Tom Wood's Custom Drive Shafts
306 E. 31st Street
Ogden, Utah 84401
www.4xshaft.com
Toll Free in the U.S.
1-877-4XSHAFT
(497-4238)
1-877-4XJOINT
(495-6468)
Worldwide
1-801-393- 4538
1-801-393- 4592
|
SPOA Axle Perches
Rocky Road Outfitters
P.O. Box 681245
Park City, UT 84068
www.rocky-road.com
1-888-801-7271 Orders |
|
|


