|
High Clearance Trans Mount with Bill Johnston
|
||
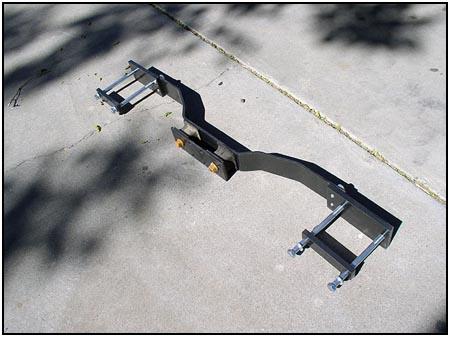
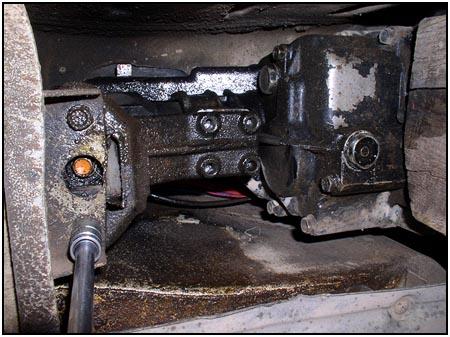
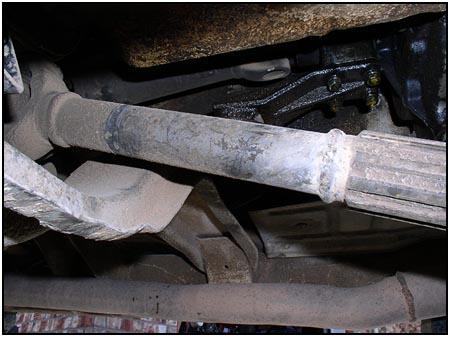 Why
would we need such a bracket? Take a look at the front driveshaft on the
left. This is a high clearance KAD shaft built by Arizona Drivelines. This
shaft is designed to have a thinner top end, so it doesn't Why
would we need such a bracket? Take a look at the front driveshaft on the
left. This is a high clearance KAD shaft built by Arizona Drivelines. This
shaft is designed to have a thinner top end, so it doesn't
 contact
the cross member as easily as a stock unit. But in the picture you can
clearly see the wear marks where this zook has flexed enough to push this
limit. The cross member has a shelf (seen in the picture to the right) that
the transmission mount bolts to. This shelf is in the way when removing and
replacing the transmission. The HCTM is a fully bolt on upgrade designed to
solve both of these problems while still providing a reliable platform to
support the transmission. contact
the cross member as easily as a stock unit. But in the picture you can
clearly see the wear marks where this zook has flexed enough to push this
limit. The cross member has a shelf (seen in the picture to the right) that
the transmission mount bolts to. This shelf is in the way when removing and
replacing the transmission. The HCTM is a fully bolt on upgrade designed to
solve both of these problems while still providing a reliable platform to
support the transmission. |
||
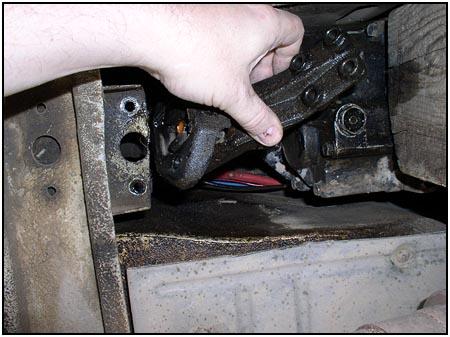
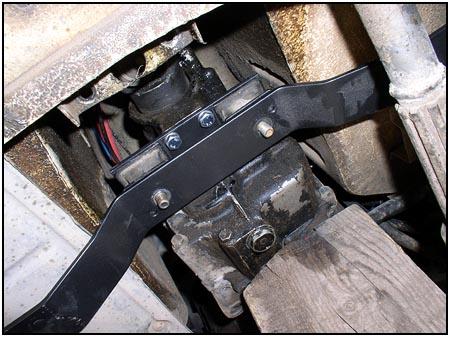
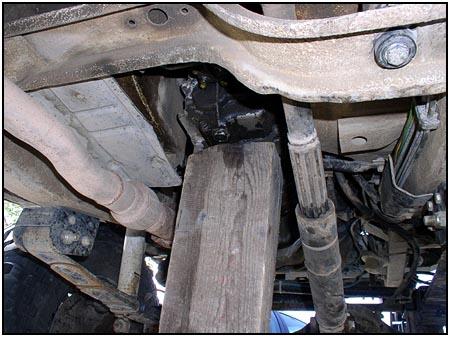  For
the installation, you first should support the transmission before removing
the original rear mount. The Samurai has a safety cross member (round tube
style located near the engine) that will hold the weight of the transmission
off the ground, but you need to relieve the pressure on the rear mount bolts
for removal. For
the installation, you first should support the transmission before removing
the original rear mount. The Samurai has a safety cross member (round tube
style located near the engine) that will hold the weight of the transmission
off the ground, but you need to relieve the pressure on the rear mount bolts
for removal. |
||
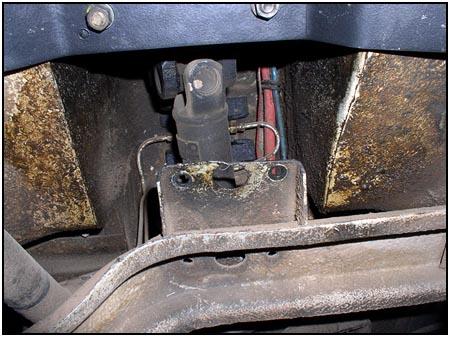
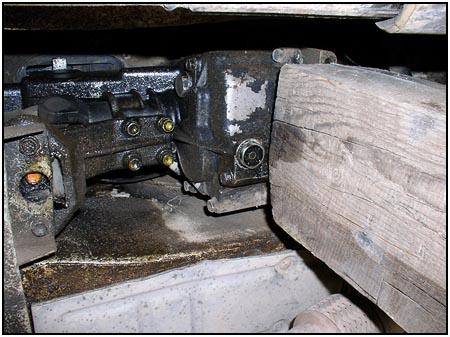
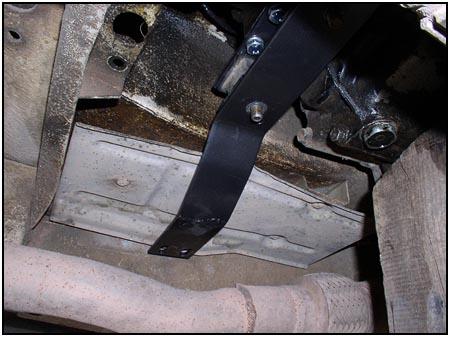
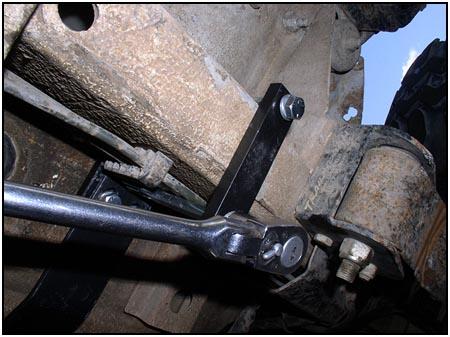
  There
are four bolts attaching the rear mount to the transmission and two bolts
holding the rear of the mount to the cross member shelf. You can also see in
the picture where the shelf had previously been trimmed to make it easier
for transmission changes. There
are four bolts attaching the rear mount to the transmission and two bolts
holding the rear of the mount to the cross member shelf. You can also see in
the picture where the shelf had previously been trimmed to make it easier
for transmission changes. |
||
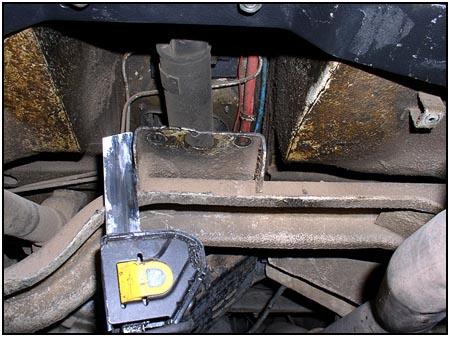
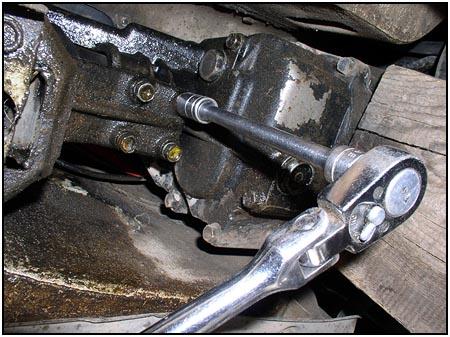
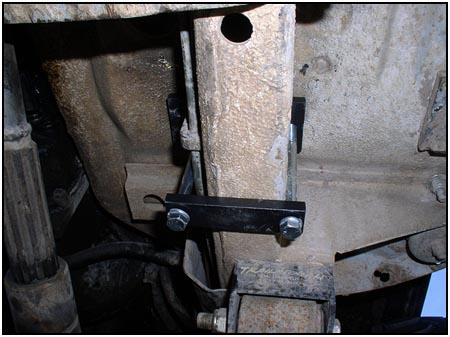
  The
rear mount is then removed and then replaced with the HCTM top plate and a
pair of rubber mounts (actually stock transfer case mounts). When purchasing
the HCTM from Rock 4xFabrication, you have the option of omitting the cost
of the rubber mounts if you have some spares in the garage. I (personally)
would include the mounts as they are handy to have as spares anyway... The
rear mount is then removed and then replaced with the HCTM top plate and a
pair of rubber mounts (actually stock transfer case mounts). When purchasing
the HCTM from Rock 4xFabrication, you have the option of omitting the cost
of the rubber mounts if you have some spares in the garage. I (personally)
would include the mounts as they are handy to have as spares anyway... |
||
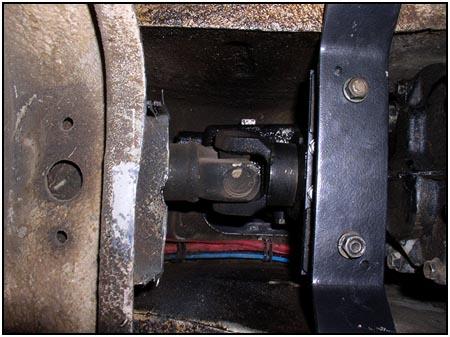
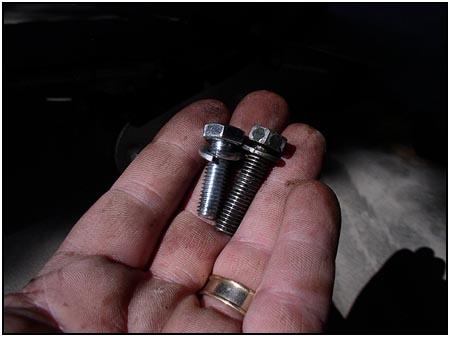  The
original bolts are very long because of the thickness of the stock rear
mount. We used shorter bolts to mount the new top plate so that we didn't
bottom out and break something while applying torque during installation. The
original bolts are very long because of the thickness of the stock rear
mount. We used shorter bolts to mount the new top plate so that we didn't
bottom out and break something while applying torque during installation. |
||
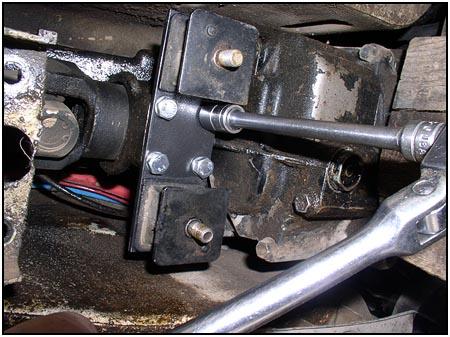
  Placing
the main cross member in place will show you just where the frame retainer
brackets need to go. Placing
the main cross member in place will show you just where the frame retainer
brackets need to go. |
||
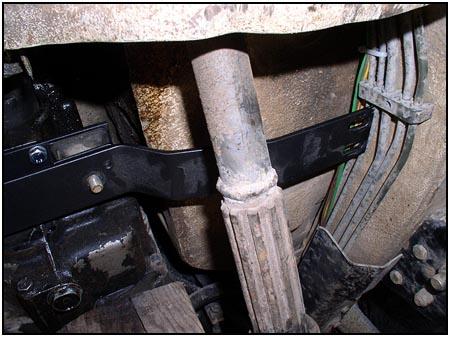
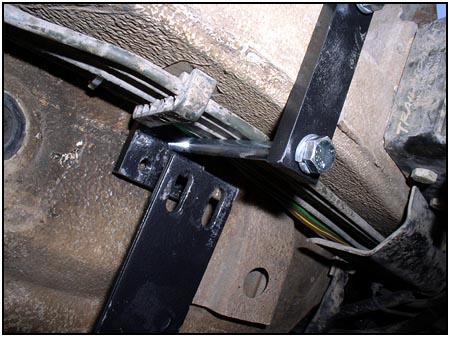
  The
heat shield on the drivers side must be removed and trimmed to allow the
frame retainer bracket bolt to slide past. The brackets leave enough room to
allow the fluid lines to pass without incident. The
heat shield on the drivers side must be removed and trimmed to allow the
frame retainer bracket bolt to slide past. The brackets leave enough room to
allow the fluid lines to pass without incident. |
||
 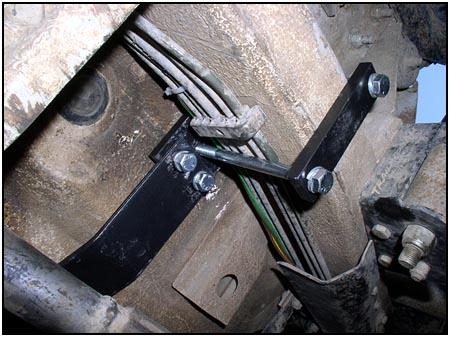 The
main cross member bolts to the frame retainer on both ends. Assemble the
brackets, but don't tighten anything down until you have made sure
everything is lined up and is not contacting anything besides the frame. The
main cross member bolts to the frame retainer on both ends. Assemble the
brackets, but don't tighten anything down until you have made sure
everything is lined up and is not contacting anything besides the frame. |
||
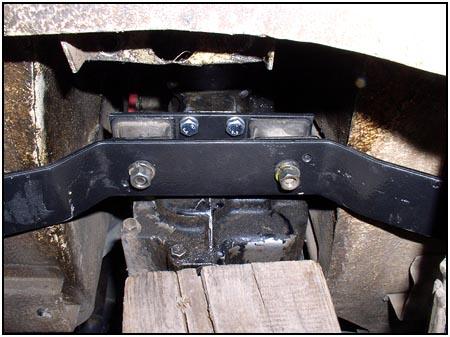 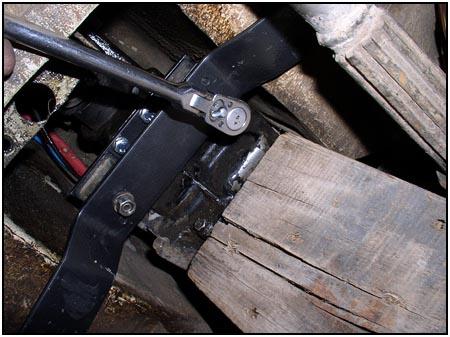 Once
everything is set the way you like it, tighten the nuts and bolts starting
from the center (rubber mounts). Once
everything is set the way you like it, tighten the nuts and bolts starting
from the center (rubber mounts). |
||
  Continue
to the outer brackets. Continue
to the outer brackets. |
||
| This installation can be done in two segments. The next segment will show how to strengthen the end of the original cross member that serves as a forward mount for the transfer case. This will allow us to trim and remove the original cross member without endangering the transfer case. Until then, we have trimmed back the original transmission mounting shelf with a sawzall. | ||
|
|
||
|
Component Source:
Rock 4x Fabrication |
||
|
|
08/22/22 13:56:22