| .Back
to Page 1
|
||
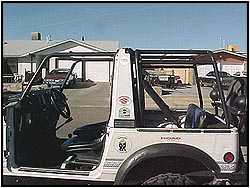
 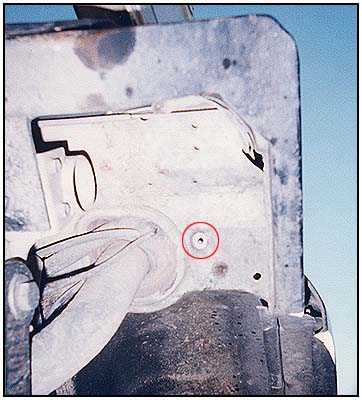 To
get to the underside of the body corner you must remove the gas filler
tube cover. There is one bolt we left out when re-assembling the cover, it
is seen in the red circle in the photo to the left. It got in the way, but
it wasn't a critical fastener. To the right you see the holes drilled for
the drivers side foot. The holes that need to be drilled are well
documented in the instructions that come with the kit. You also receive a
steel template so that measuring mistakes are kept to a minimum. To
get to the underside of the body corner you must remove the gas filler
tube cover. There is one bolt we left out when re-assembling the cover, it
is seen in the red circle in the photo to the left. It got in the way, but
it wasn't a critical fastener. To the right you see the holes drilled for
the drivers side foot. The holes that need to be drilled are well
documented in the instructions that come with the kit. You also receive a
steel template so that measuring mistakes are kept to a minimum. |
||
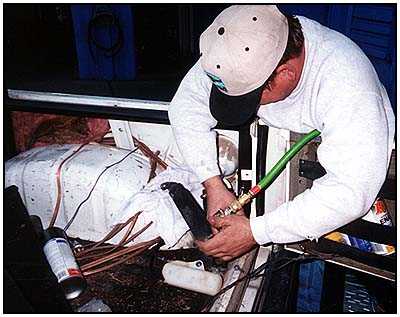
 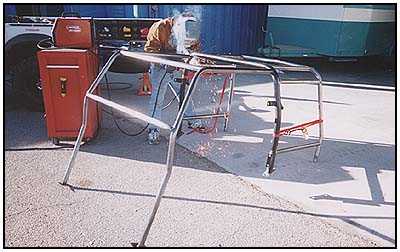 We
finished up the other welding just as we did on the front using ratchet
straps and tacking it. Then we lifted the complete cage out of the vehicle
for final welding and painting. The ability to shift the front-to-rear
stringers in the rear section of the cage allowed us to move the upper
sidebar a little higher. This put it just above the side window when the
top is on. This will the tube to contact the material in the top instead
of the window plastic. We
finished up the other welding just as we did on the front using ratchet
straps and tacking it. Then we lifted the complete cage out of the vehicle
for final welding and painting. The ability to shift the front-to-rear
stringers in the rear section of the cage allowed us to move the upper
sidebar a little higher. This put it just above the side window when the
top is on. This will the tube to contact the material in the top instead
of the window plastic. |
||
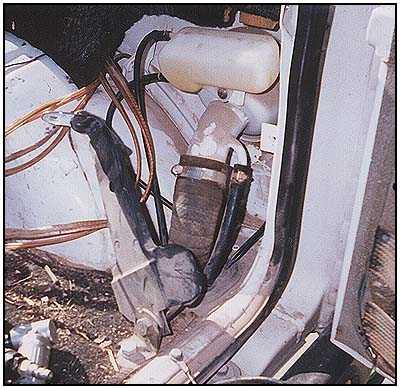
  besides
drilling a few holes (4 for each leg of the cage), the only other
modification you need to be concerned with is notching out a small section
of the inner cover for the gas tank filler neck. This is where the
passenger rear corner tube comes down to the foot we installed earlier.
Some metal shears and a small spritz of matching paint make short work of
it. Don't just remove the cover and throw it away... this is a
safety feature and should be retained to some protection for the rubber
filler neck from sliding tool boxes. Remember... Safety First!
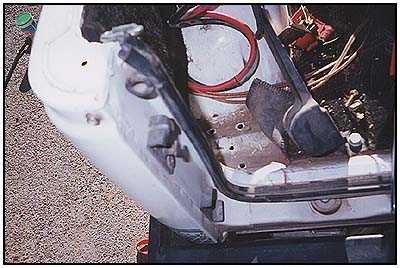
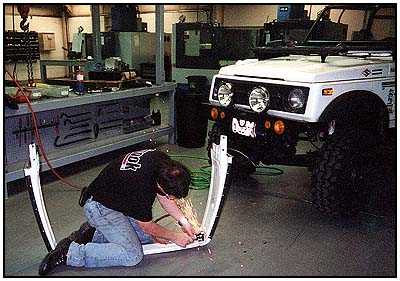
Remember when we mentioned fitting the targa back on? the photo to the
right shows some of the 'massaging' that had to be done to our targa when
we realized we had measured incorrectly before welding. Don't let this
happen to you, trail fit the targa before making that final weld! besides
drilling a few holes (4 for each leg of the cage), the only other
modification you need to be concerned with is notching out a small section
of the inner cover for the gas tank filler neck. This is where the
passenger rear corner tube comes down to the foot we installed earlier.
Some metal shears and a small spritz of matching paint make short work of
it. Don't just remove the cover and throw it away... this is a
safety feature and should be retained to some protection for the rubber
filler neck from sliding tool boxes. Remember... Safety First!
Remember when we mentioned fitting the targa back on? the photo to the
right shows some of the 'massaging' that had to be done to our targa when
we realized we had measured incorrectly before welding. Don't let this
happen to you, trail fit the targa before making that final weld! |
||
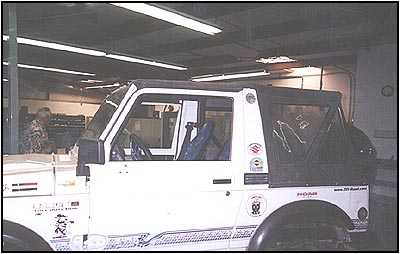
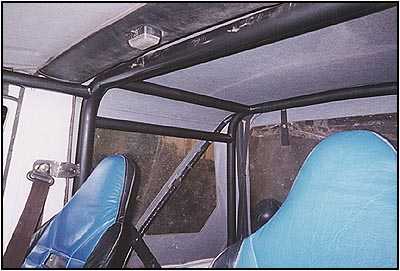  Here
are a few shots of the finished installation. You can see how everything
tucks neatly under the stock top without taking away too much room inside.
Notice the sun visors in the photo to the left... they are still mounted
in the stock location using stock hardware. The bar fits right above them
without getting in the way. You will have to keep the hoop that holds up
the back of the soft top. The cage was designed for strength more than how
it conforms to the inside of the material. Here
are a few shots of the finished installation. You can see how everything
tucks neatly under the stock top without taking away too much room inside.
Notice the sun visors in the photo to the left... they are still mounted
in the stock location using stock hardware. The bar fits right above them
without getting in the way. You will have to keep the hoop that holds up
the back of the soft top. The cage was designed for strength more than how
it conforms to the inside of the material. |
||
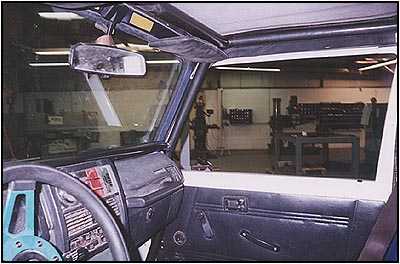
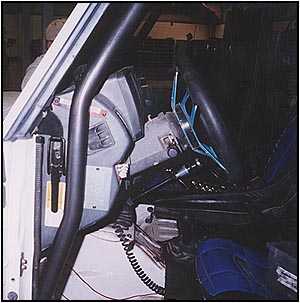 You
can see how the cage is designed to fit next to the dashboard without
restricting access to the windshield clamp of the fold down kit. By
placing the tube on the outside of the dash board instead of in front of
it, you have full access to you whole dashboard. No more relocating
switches... You can also see how the tube misses the side air vent
once we replaced them. You
can see how the cage is designed to fit next to the dashboard without
restricting access to the windshield clamp of the fold down kit. By
placing the tube on the outside of the dash board instead of in front of
it, you have full access to you whole dashboard. No more relocating
switches... You can also see how the tube misses the side air vent
once we replaced them. |
||
 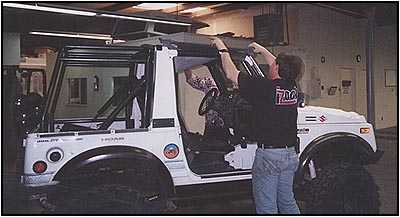 Once
the top is in place you hardly notice the cage. If you look closely you
will see the tube that follows the 'A' pillar (the side of the
windshield), but not much more. Once
the top is in place you hardly notice the cage. If you look closely you
will see the tube that follows the 'A' pillar (the side of the
windshield), but not much more.
THEN, you drop the top and hit the trail. People will notice the difference immediately. And you will feel a bit more secure when you fold down the windshield. If you ever had dreams of building a true off-highway vehicle, then those dreams probably included having some kind of a cage system. Might as well do it right and add the Trail Tough Family Style Cage. |
||
  |
||
| Source:
Trail
Tough Products |
||
08/22/22 13:43